Custom Connector Tips
Things to know #1
Once you have created and deployed a Custom Connector and wish to run it every 30 minutes, you can configure this by going to the
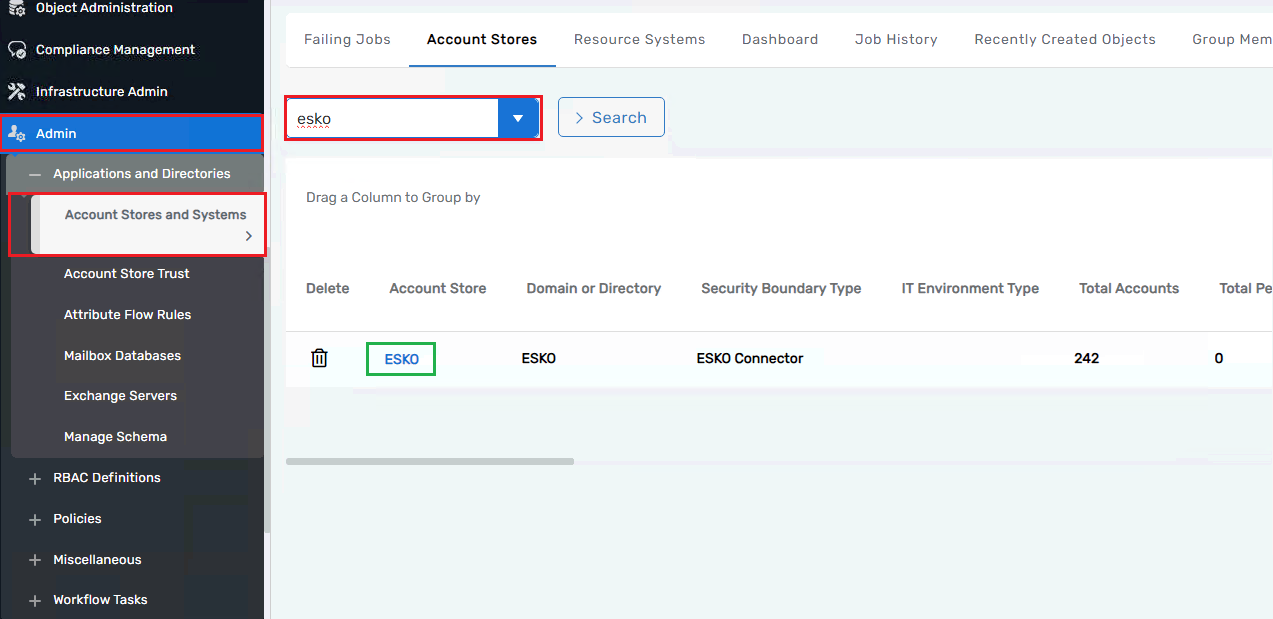
Go to Admin → Applications and Directories, then navigate to the Account Stores tab and search for our connector, for example, "ESKO." Please search your connector name and click on it.
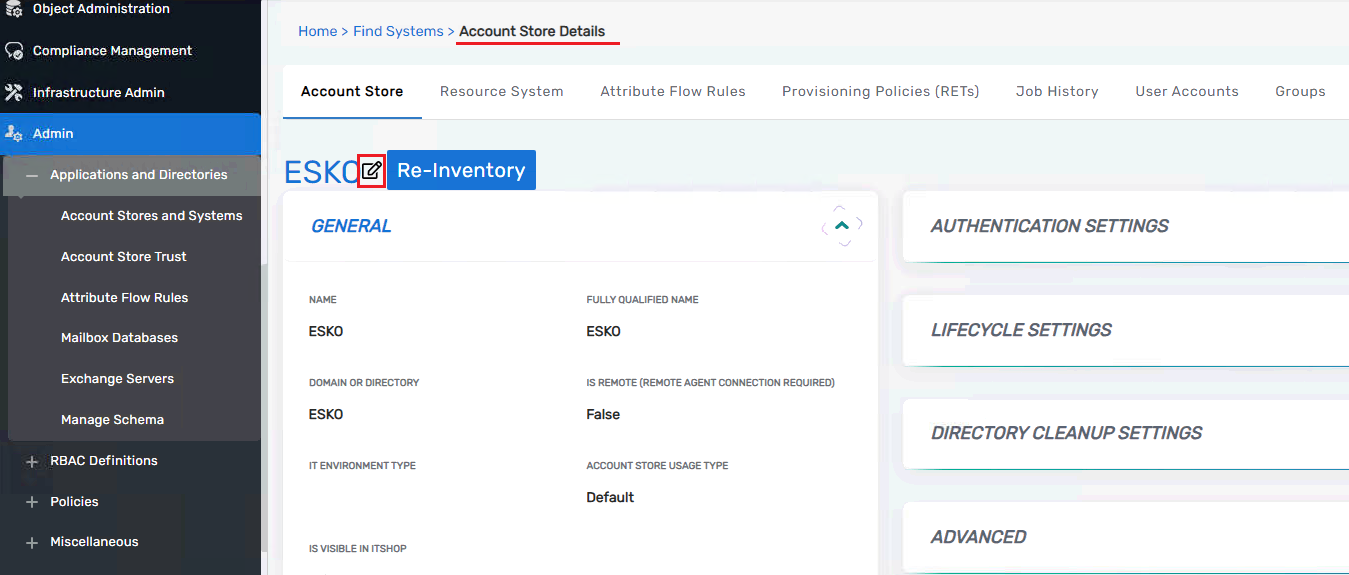
This directs you to the Account Store Details page. Click the pencil icon before the Re-Inventory.
This directs you to another page. Navigate to the Inventory tab, check "Run Indefinitely," and enter 30 in the Interval textbox.

Things to know #2
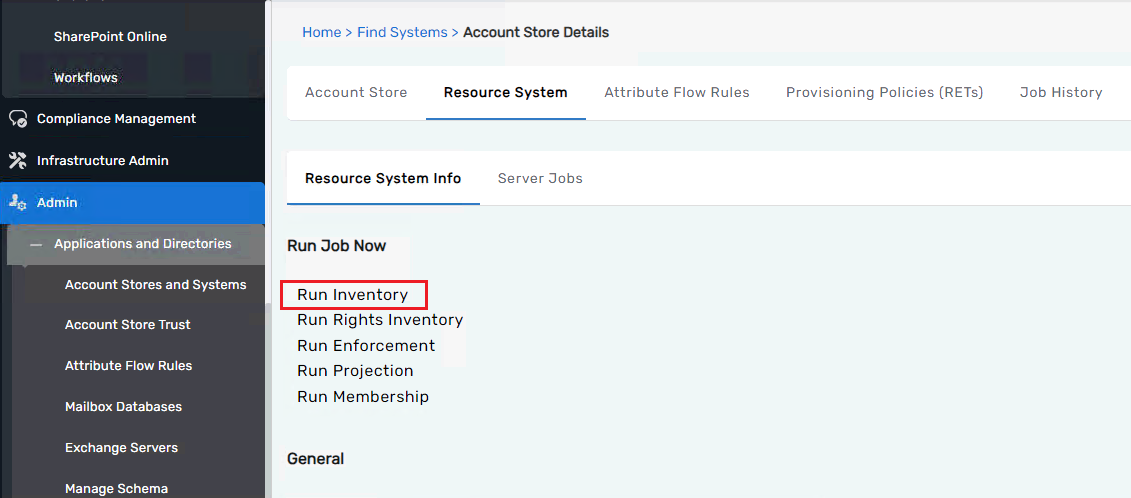
We can run the Inventory using the CustomConnectorUtility, but we can also run it from the UI by going to the Account Store. Then, navigate to the Resource System tab and ensure the Resource System Info tab is selected. Finally, click on the Run Inventory link.
Things to know #3
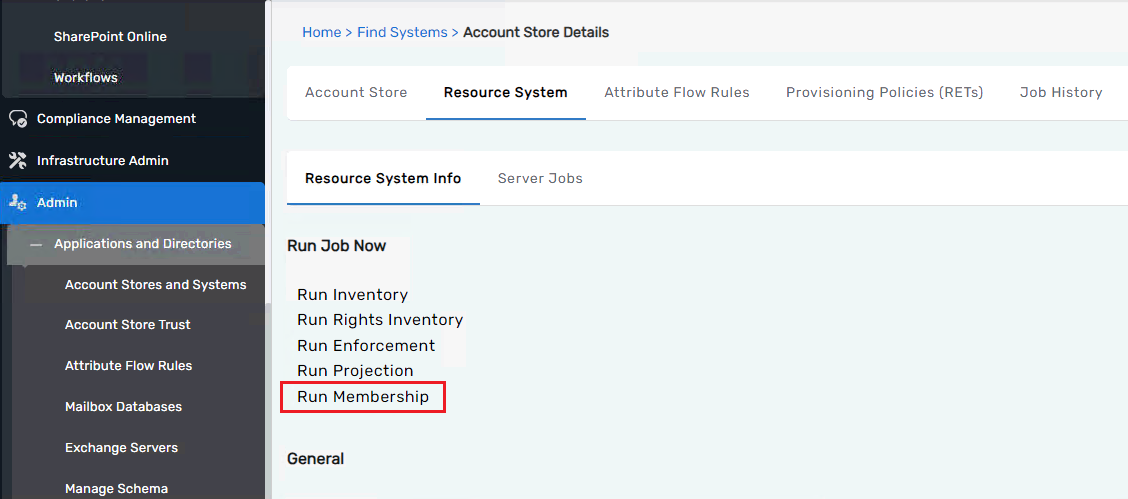
If you want to run the GroupMembership job, you can do it from the UI as well as using the CustomConnectorUtility. Go to your account store, then navigate to the Resource System tab and ensure the Resource System Info tab is selected. Finally, click on the Run Membership link.
If you want to run the GroupMembership job from the CustomConnectorUtility, here is how you can do it.
CustomConnectorUtility --runMem --systemID=1011
![]()
In our Custom Connector Labs, we have written our code in the GetAll and GetByID methods of the UserASIEProvider class. However, when working with a real or live connector, you should write your code in the AccountInventoryProvider class to manage user accounts and use the GroupInventoryProvider class for inventorying groups and so on and so forth. You can find all these classes under the Inventory Provider folder.
For the write-back in the external system, we use the UserASIEProvider and GroupMembershipProvider classes. For Zones and Roles write-back, we also use the UserASIEProvider class.
Things to know #4
Always reset IIS after making config changes.
Things to know #5
In the registration class, you define the configuration settings that are intended to remain constant across the lifetime of the system.
Things to know #6
Sometimes, you may want to make certain values—like a connection string or a login URL—configurable, rather than hardcoding them into your connector. This can be easily done by using the Configuration Parameters section in EmpowerID.
To set this up, start by going to your Account Store —for example, AlphaAccountStore. From there, switch to the Resource System tab. As you scroll down, you’ll see an option labeled Configuration Parameters. Clicking on that takes you to a screen where you can view, add, or modify settings that your connector will read at runtime.
For instance, if you want your connector to pick up the database connection string from a central location, you can create a parameter named ConnectionString, and then enter the full connection string in the Value field. This value will then be accessed by your code using the exact parameter name you've defined—no need to change anything in your code when the connection string changes in the future.
Once you're done entering the details, just click Save, and your parameter is ready to be used by the connector.