EmpowerID API
EmpowerID API Development: Overview
EmpowerID enables developers to create and expose APIs that act as secure entry points into the platform, allowing external systems, services, and applications to interact with its core functionalities. These APIs are built using the .NET 4.7.2 framework and are commonly used to expose business logic, retrieve EmpowerID data, or integrate with third-party systems.
A typical API project in EmpowerID follows a well-structured pattern consisting of four main components:
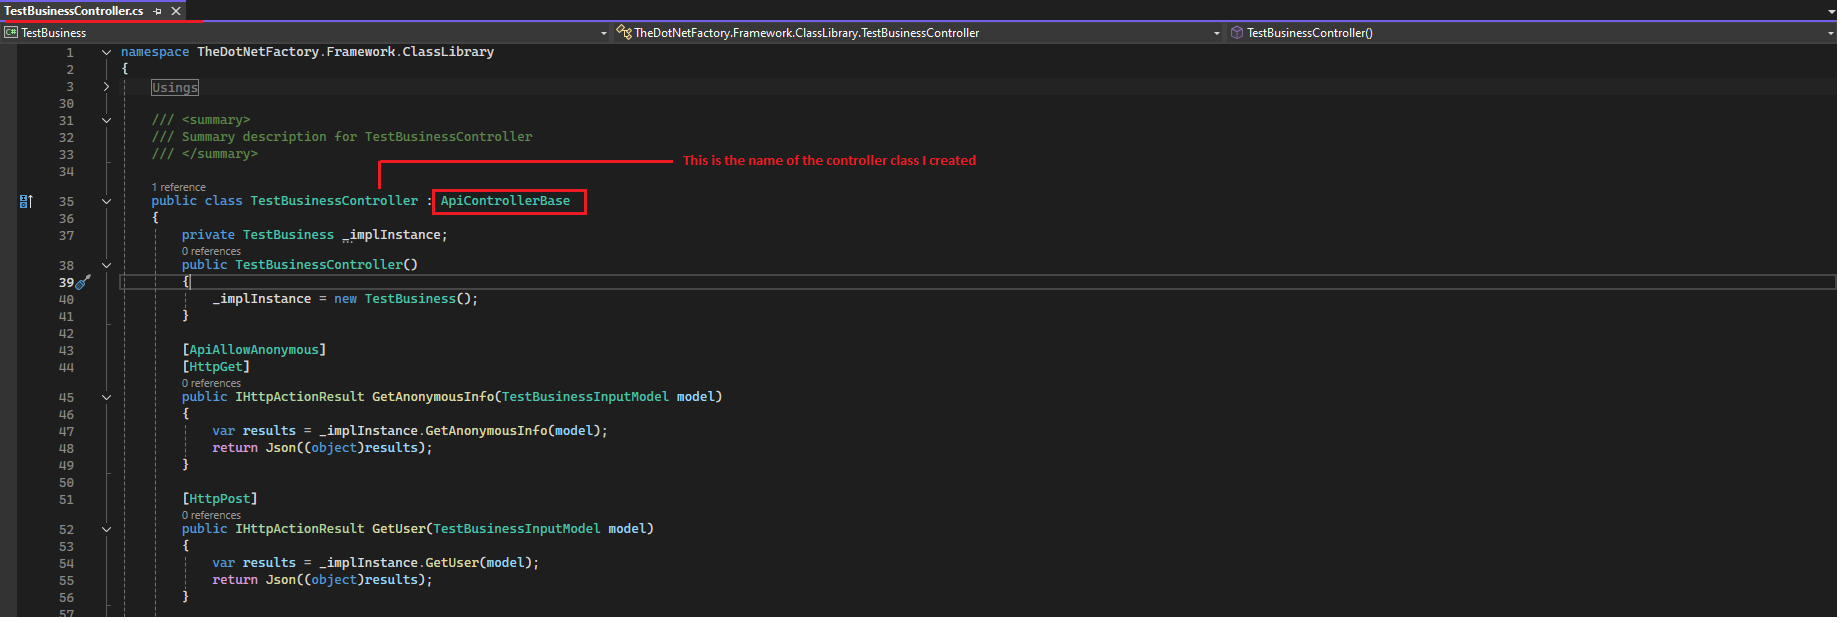
1) Controllers serve as the primary entry points for API requests. They handle HTTP calls and delegate the actual business logic to service classes. In EmpowerID, controllers usually inherit from APIControllerBase, which provides built-in security and routing support.
2) Service Classes contain the implementation of business logic. Separating this logic from the controllers promotes cleaner and more modular code. Any service class that includes protected methods should be marked with the [RBACProtectedAttribute] attribute to ensure secure execution.

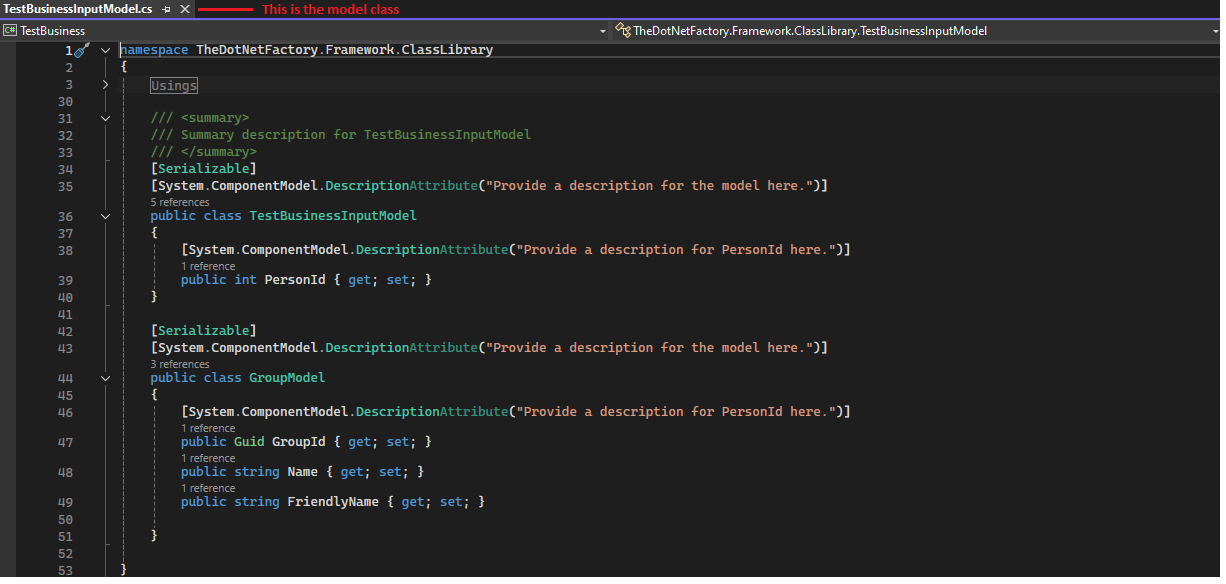
3) Models define the data structures exchanged between the client and the API, both as input and output. These classes help maintain consistent and well-defined contracts for your API operations.
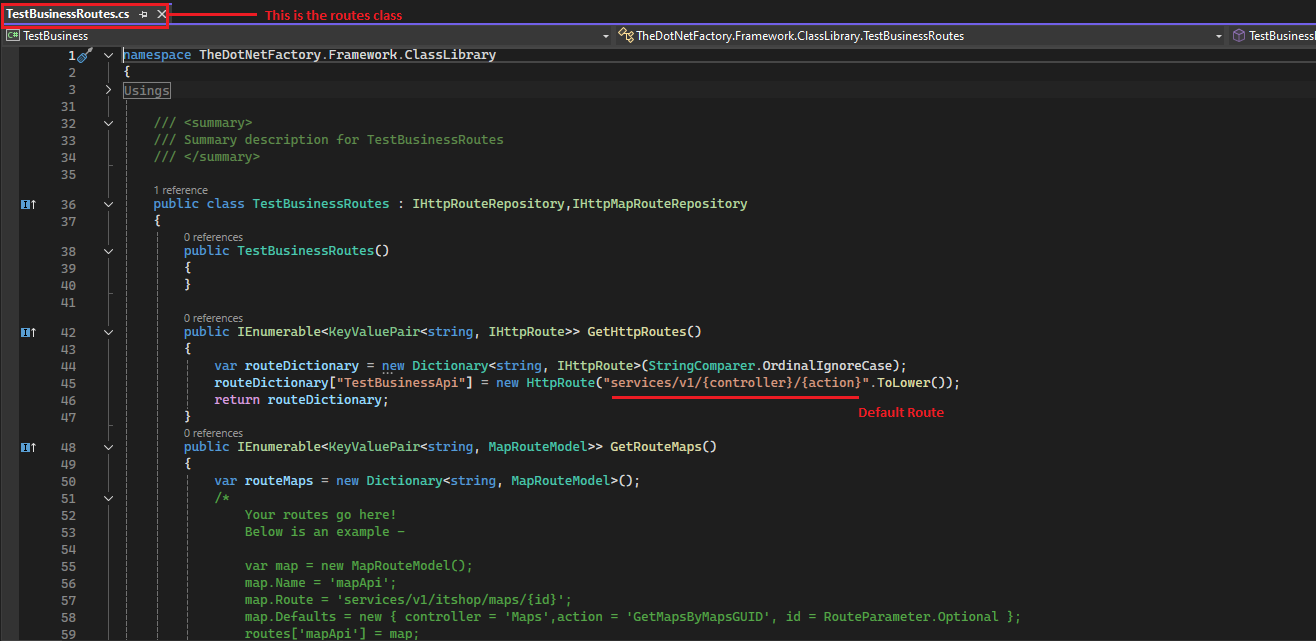
4) Routes determine how API endpoints are accessed. By default, EmpowerID uses a route format like Services/V1/[Controller]/[Action] to provide predictable and REST-like API URLs.
Security in EmpowerID APIs
Security is a core consideration when building APIs on the EmpowerID platform. When your controller inherits from APIControllerBase, it automatically benefits from EmpowerID’s foundational security mechanisms. If a controller does not inherit from APIControllerBase, you will need to implement your own custom security handling
There are several ways you can configure access to your APIs:
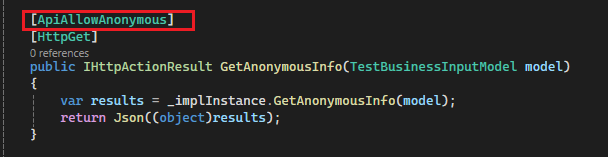
Anonymous Access: By applying the [ApiAllowAnonymous] attribute to specific action methods, you can make certain endpoints publicly accessible without authentication.
Authentication & Authorization: For protected APIs (which is the default), clients must obtain and provide a valid access token. This token is issued by an OAuth (OIDC) application registered within EmpowerID.
Scopes: You can define and associate scopes with your API endpoints. A client’s token must include the required scope(s) to gain access to those endpoints, offering a fine-grained access control mechanism.
RBAC: EmpowerID also integrates RBAC into API security. You can restrict access to APIs based on the user’s assigned roles and permissions, ensuring alignment with organizational policies.
Understanding the EmpowerID API Publishing Process
Publishing an API project in EmpowerID involves several important steps that happen both automatically and sometimes manually. When you build your API project in Visual Studio, a post-build event—configured by Workflow Studio—is triggered behind the scenes. This event is essential, as it initiates the generation of a metadata file that EmpowerID uses to understand and register your API.
The metadata file, typically in JSON format, contains critical information about your API. This includes encoded assembly data, a list of exposed endpoints, and other details EmpowerID needs for proper registration. You’ll find this metadata file stored in a folder named _PublishedItems within your API project directory.
Once the metadata file is generated, it doesn’t get published automatically. Instead, you need to manually submit it through the EmpowerID web interface. This is done by navigating to the "Publish Workflow Studio Item" section. There, you select the generated metadata file and submit it for publishing.
At this point, EmpowerID processes the metadata and registers the API endpoints. It scans your controller classes and action methods to understand how the API is structured. A key part of this step is the use of the RelatedApplicationAttribute, which helps EmpowerID determine which application the endpoints belong to.
One of the advantages of working with EmpowerID is that you don’t need to manage your own IIS application for hosting APIs. Once your API is published, it’s automatically hosted by the central EmpowerID API application within IIS. This simplifies deployment and keeps everything centralized.
In some environments, the Web Role Service plays a supporting role by ensuring the API’s compiled DLL is placed in the correct bin folder within the EmpowerID API application. However, depending on your setup, this step may not always happen automatically. In such cases, you may need to manually copy the DLL into the appropriate folder.
Finally, after the publishing process completes, your API should appear under the associated application in the EmpowerID UI, specifically within the Protected API Endpoints section. Be aware that there may be a short delay before the UI reflects the changes. In some instances, you might need to recycle IIS to see the updates take effect.