Repeater Control
In EmpowerID, a newly introduced feature is the Repeater Control. This control distinguishes itself from the conventional EmpowerID controls visible upon clicking any field, entering the edit mode, and accessing the controls tab, where a list of controls is traditionally displayed. Instead, the Repeater Control serves as a technique for rendering sections repeatable, providing users with a distinct technique for managing repetitive content.
Steps to Create a Repeater Control or Make Sections Repeatable:
-
On your Form go to the Data Sources right click on it and select Add Data Source option.

-
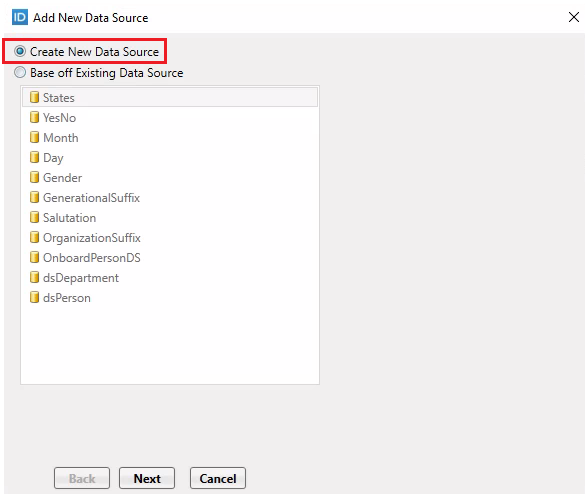
The Add New Data Source dialog box will appear. From there, select the Create New Data Source option and click on the Next button.
-
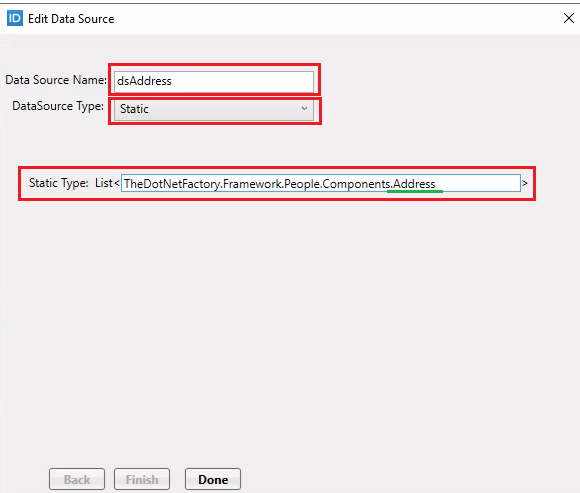
Enter any name in the Data Source Name textbox. From the DataSource Type dropdown, select the Static option. In the Static Type List field, provide the name of your component that you want to bind with the Repeater Control or Section. Click on the Finish button.
-
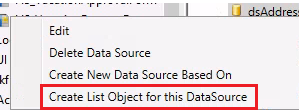
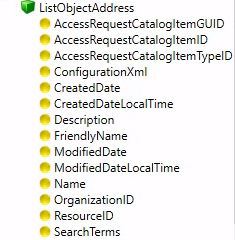
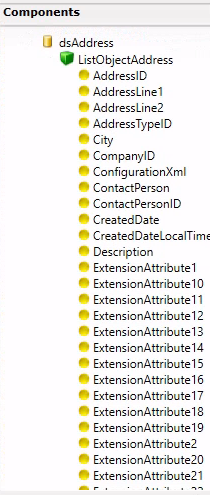
Once your DataSource of type Static is created, right-click on it and select the Create List Object for this DataSource option.
-
An object will be created, namely ListObject1. Double-click on it and rename it to your preferred name, for example, ListObjectAddress.
![]()
![]()
- Save and close your form, then reopen it so that all the attributes of your static DataSource can be loaded correctly.
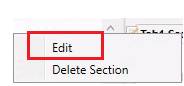
- Now right-click on the section and click on the edit option.

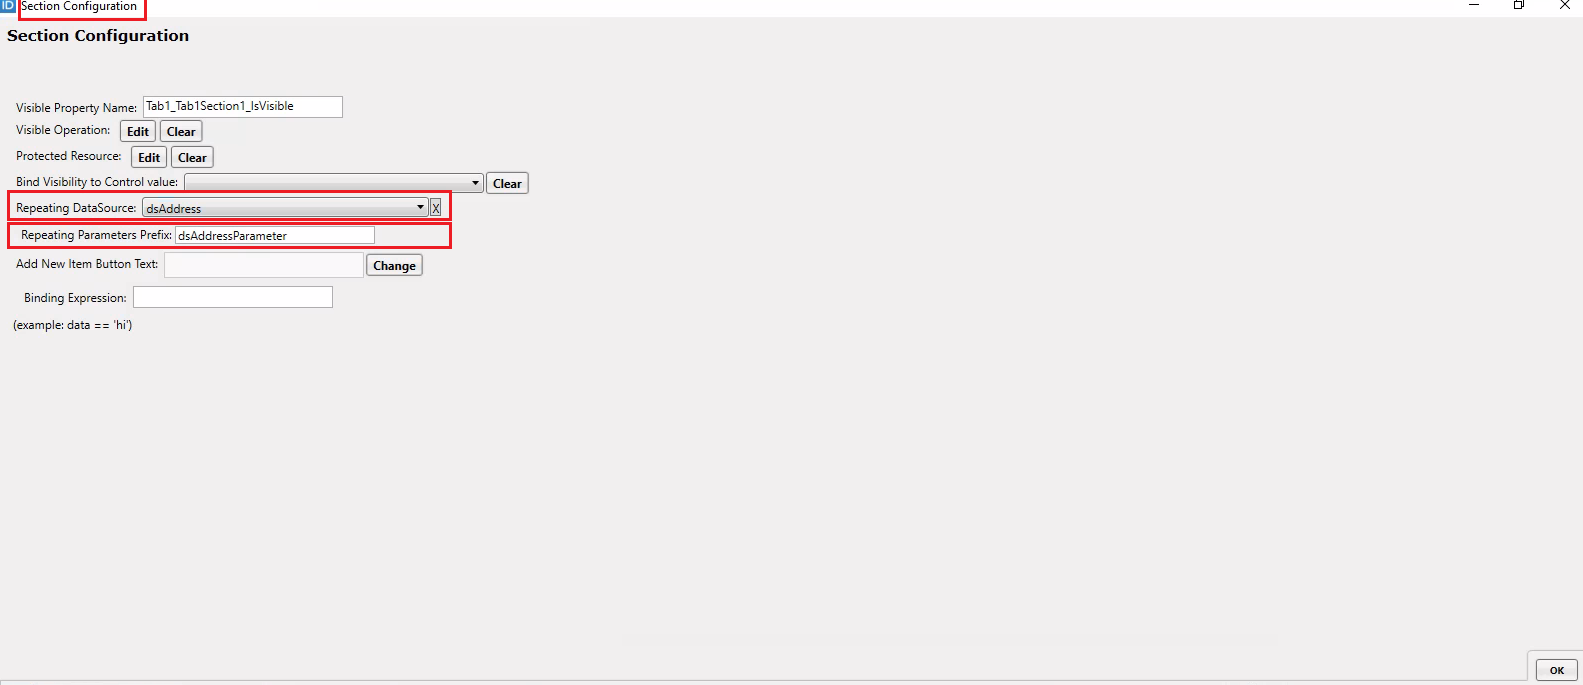
- A Selection Configuration dialog box will appear. To make your Section repeatable, select your static data source from the Repeating Datasource dropdown. The next important property is the Repeating Parameter Prefix; type any meaningful name into it. Click on the Ok button.
Repeating Parameter Prefix: In this property, you provide the value to prefix your repeater control. This means that in the code behind or backend, if you want to access your repeater control, you would have to use this property’s name. Moreover, three collections will be created behind the scenes using this property name, each serving a specific purpose in the functionality of the repeater control.
-
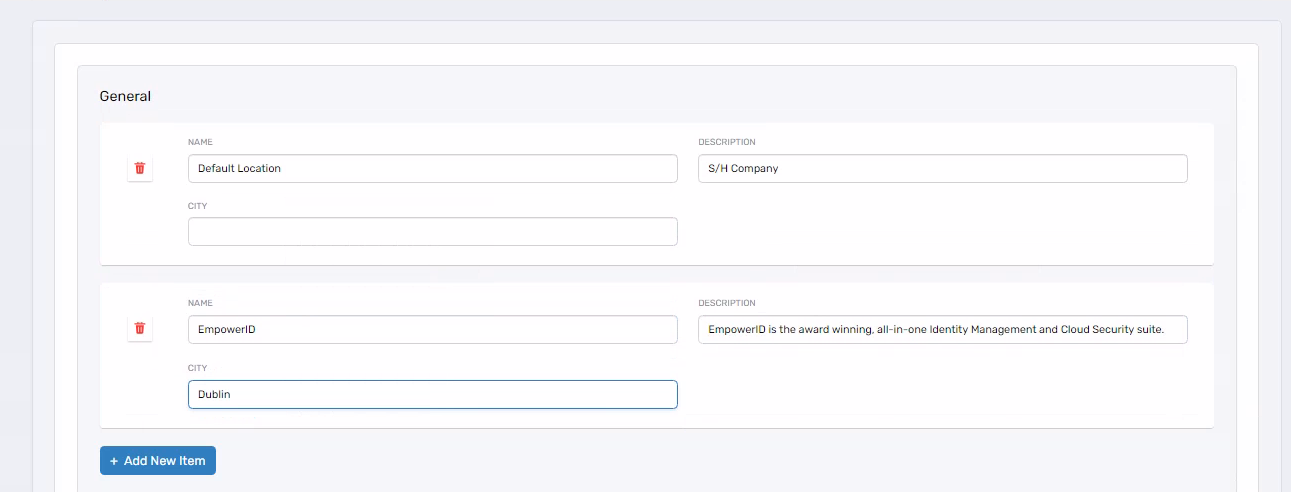
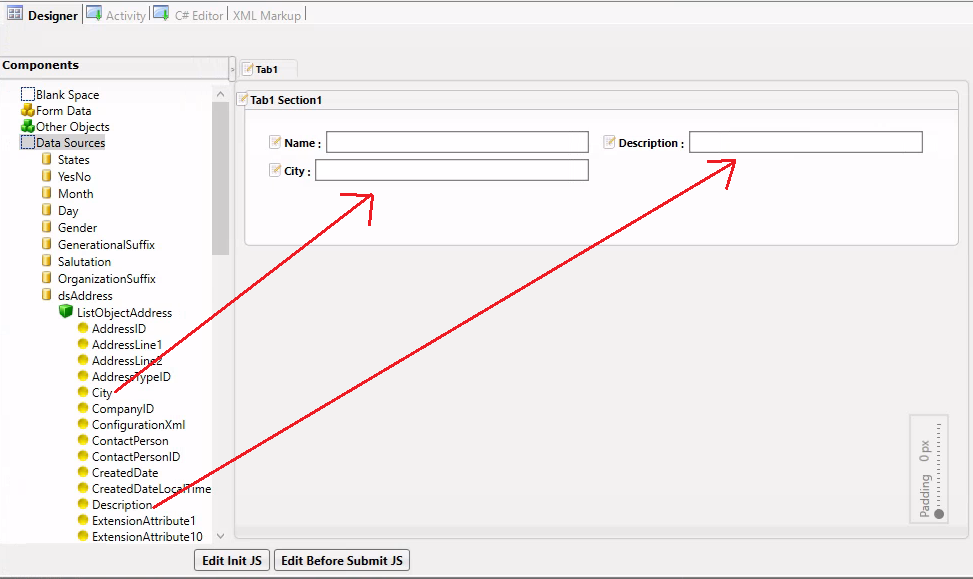
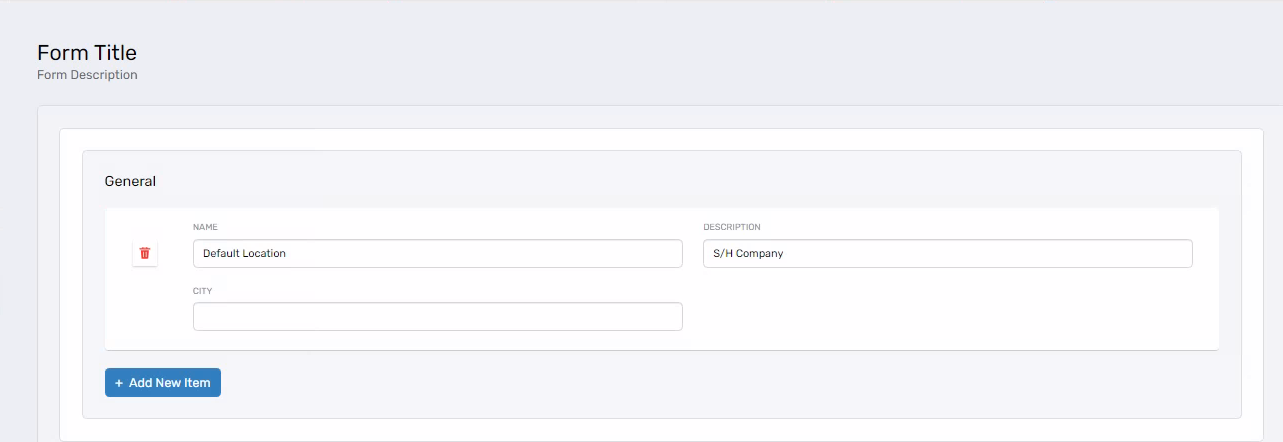
Now drag and drop the fields onto your section that you want to display in a repeater control. In our example, we have dropped Name, Description, and City fields.
-
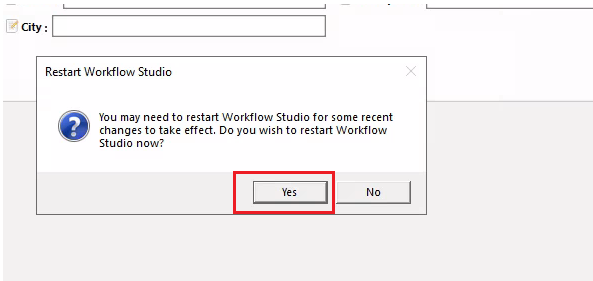
Publish your form and restart the workflow when asked.
-
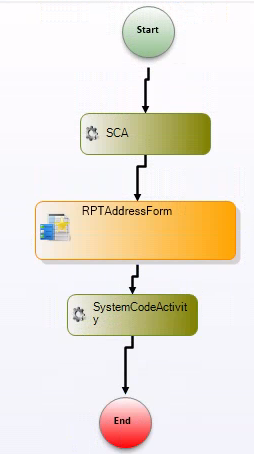
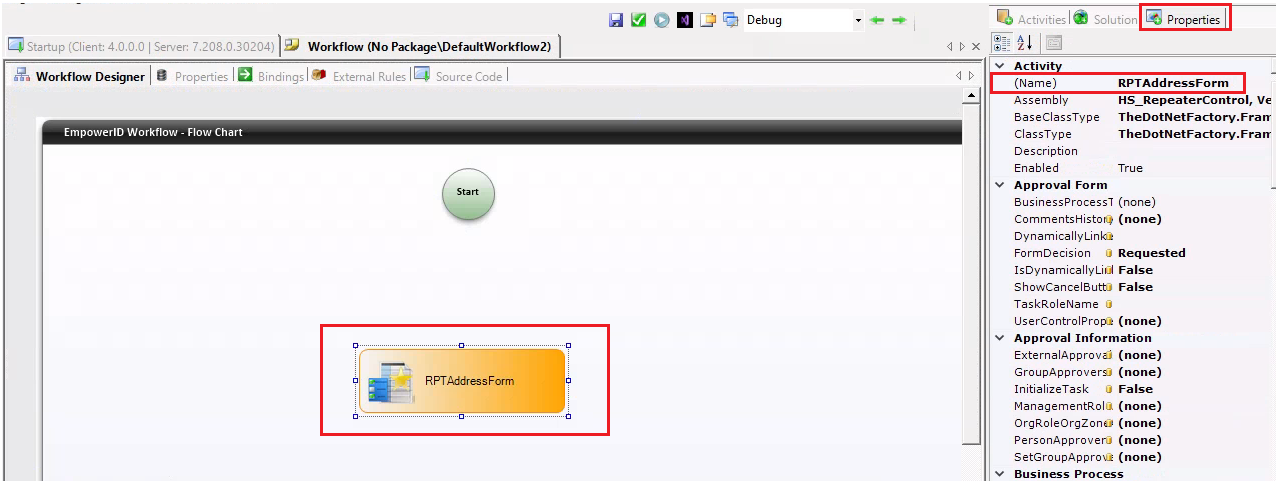
Create a workflow and drag and drop your Form activity onto the Workflow Designer pane. Select it, and in the Properties tab, go to the Name property and give it any name, for example, RPTAddressForm.
-
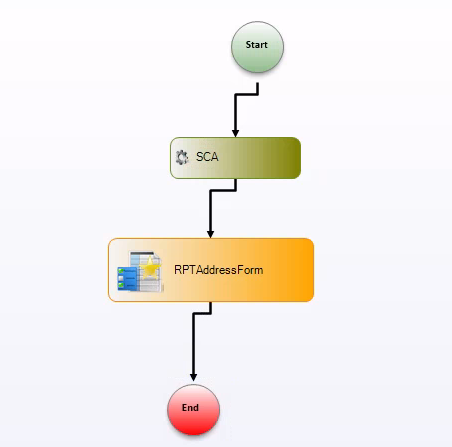
Drag and drop the System Code Activity onto the Workflow designer pane, give it any name (for example, SCA), double-click on it, and write the following code in its Implement method.
//CurrentWorkflow.HereComesTheNameOfYourForm.HereComesTheNameOfYourDatasource With DataSource_Static = C.YourComponentName.GetAll();
CurrentWorkflow.HSRpt.dsAddressDataSource_Static = C.Address.GetAll();

-
Connect your System Code Activity with the Form Activity with the help of a line originating from the Start circle and ending at the End circle.
-
Publish your Workflow first from the Workflow Studio and then publish it in the UI and run it.
Key Considerations for Repeater Control
a) On your repeater control, you have the Add New Item button. Using this button, you can add a new item to the repeater. If you want to modify the text on this button, you can do so. The text on the button can be localized as well.

b) Do Not Show in Add New: If this property is checked on any field or attribute, then that field will not be displayed after you click on the Add New Item button. Instead, the field will only appear for the existing items but not for the new items.
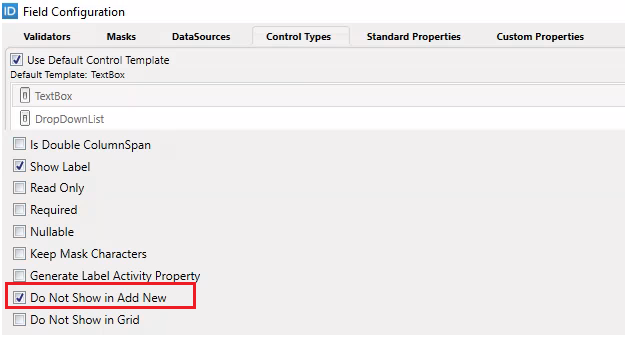
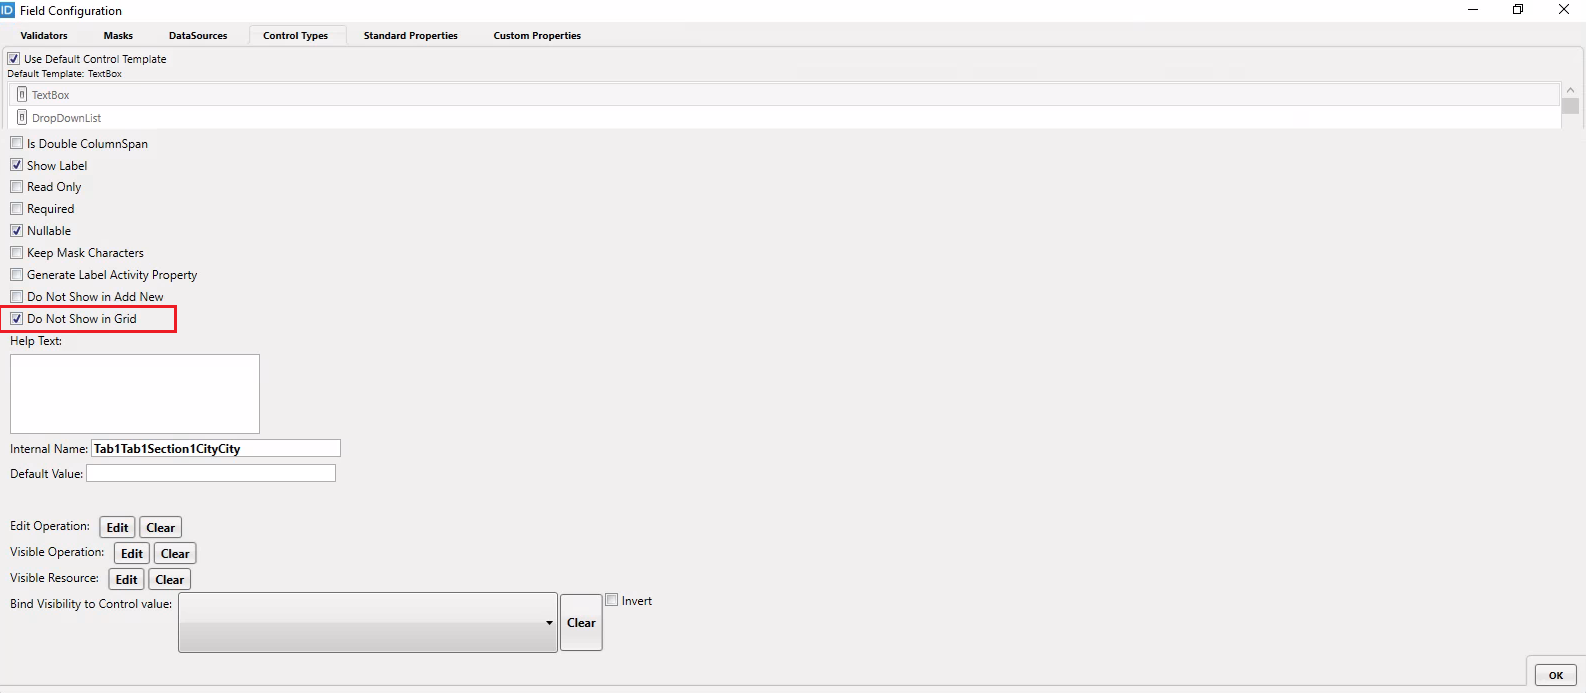
c) Do Not Show in Grid: If this property is checked on any field or attribute, then that field will not be displayed for the existing item. The field will be displayed for the new items only.

Now, I have enabled Do Not Show in Add New on my Name field and Do Not Show in Grid on my City field. Additionally, I have localized my Add New Item button. This is how my repeater looks now.
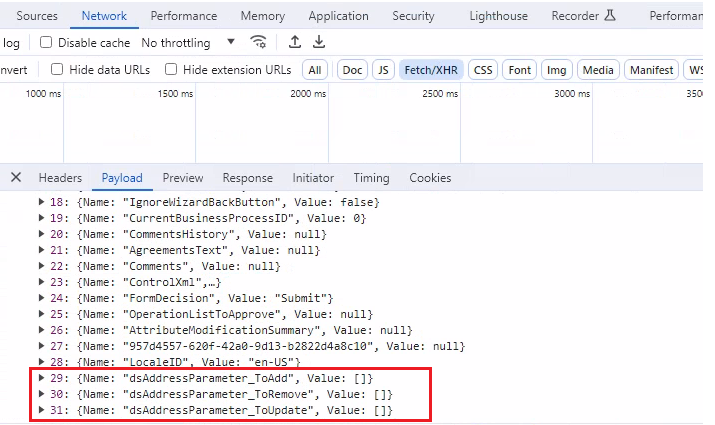
d) Behind the scenes, a repeater control creates three collections: one for adding (_ToAdd), one for updating (_ToUpdate), and one for removing (_ToRemove). In our case it is dsAddressParameter_ToAdd, dsAddressParameter_ToRemove, dsAddressParameter_ToUpdate respectively.
If you want to extract values from your repeater control and add, update, or delete data in the database, refer to the code sample below. I have written this code in a System Code Activity, placing it after my Form's activity.
[TheDotNetFactory.Framework.Common.ActivityEventHandlerPostSharpAttribute()]
public virtual void Implement(object sender, System.EventArgs e)
{
    var ucp = CurrentWorkflow.HSRpt.UserControlProperties;
    var toAdd    = ucp["dsAddressParameter_ToAdd"];
    var toUpdate = ucp["dsAddressParameter_ToUpdate"];
    var toRemove = ucp["dsAddressParameter_ToRemove"];

    C.Address.Insert(GetAddressForDbOperation(toAdd));
    C.Address.Update(GetAddressForDbOperation(toUpdate));
    C.Address.Delete(GetAddressForDbOperation(toRemove));
}

private E.TList<C.Address> GetAddressForDbOperation(object userControlProperties)
{
    if (userControlProperties == null)
        return new E.TList<Address>();

    var objList = (System.Collections.Generic.IList<object>)userControlProperties;
    var Addresses = new E.TList<C.Address>();

    foreach (var obj in objList)
    {
        var dictionary = obj.ToObjectDictionary();
        var Address = ObjectFactory.CreateObject<C.Address>(typeof(C.Address), dictionary);
        Addresses.Add(Address);
    }
    return Addresses;
}